Pallet Town, Route 1
 |  |
Starting The Game
 Welcome to the world of Pokemon on Pokemon FireRed and Pokemon LeafGreen. This is a remake of the original Pokemon RPGs, so many things are alike. The game starts with a cool intro that is almost exactly like the intros in the original games. It then prints instructions on which buttons does what. After reading what the game has to say, you'll see Professor Oak (Prof. Oak from now on), talking about Pokemon. He first wants you to know if you're a boy or a girl, and then allows you to choose your name. Then you'll choose your rival's name. After a bit of talking with the Professor, you'll find yourself in your bedroom in the peaceful Pallet Town.
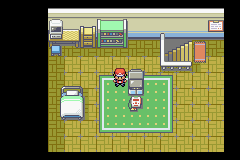
 The first thing you want to do is go to your PC at the top-left hand corner of your room and take out the Potion. This restores 20 HP, and will be helpful real soon as you're about to find out. Go downstairs, talk to your mom, and go outside. Go north into the grass area. Prof. Oak will come to tell you that it's dangerous to go on without a Pokemon. He'll take you to his lab, where your rival (known as Gary from now on) is waiting. He asks you to choose a Pokemon. Go to the table with the three PokeBalls and choose the Pokemon of your choice.
Choose Your Pokemon
| A cute little frog-like Pokemon that can launch powerful attacks. This is the best choice for beginners, as it can take on the Pokemon in the first four Gyms easily. |
| A turtle loaded with gallons of water. The level of difficulty of choosing Squirtle is medium. It has certain advantages in the beginning, but begins to have disadvantages faster than Bulbasaur. |
| Little fire-breathing salamander. The hardest Pokemon to choose because of the many disadvantages in the beginning. However, it will become very powerful later on. |
Each Pokemon has its own advantages in the game, so choose wisely. It is suggested that beginners choose Bulbasaur, since it's a Grass-type and is strong against the Pokemon in the first Gym, which are Rock-type. After choosing your Pokemon, Gary will come over to the table and choose his Pokemon, which will have an advantage over your Pokemon. For example, if you were to choose Bulbasaur, Gary will choose Charmander. He'll talk to you afterwards, and as you leave, he'll challenge you to your first battle.
Be careful during this first battle, as Gary's Pokemon is stronger than yours, even though you both have lv. 5 Pokemon. The Potion may come in handy now. During this battle, you'll constantly be interrupted by Prof. Oak's tutorials. The good thing about this battle is that you get some money if you win, and your Pokemon's level is instantly raised to 6.
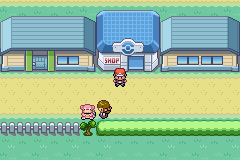
Now leave the city and go North into Route 1 and towards Viridian City.
Try to level up in this route. When you get damaged, be sure to either go back to your house for a free healing from your mom, or to the Pokemon Center in the next city. Talk to the first person you see for a free Potion. Sooner than you think, Route 1 is coming to an end.
| Locations (Route 1) |
|---|
|
 After a long walk in the wilderness, you finally arrive in civilization. This is Cerulean City, home of the second Gym. Heal your Pokemon and stock up on items. You won't be battling in the Gym first. Your rival, Gary, is waiting patiently for you. Let's not make him wait too long!
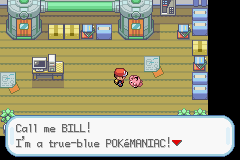 There are tons of trainers waiting to battle you on Route 25. Behind one of those trainers you will find TM43 - Secret Power. But that isn't the main reason you've come upon this route. You want to meet a scientist named Bill. Go all the way to the end of Route 25, and you'll arrive at a house called Sea Cottage. Go inside, and you'll see a Clefairy. It turns out that something went wrong with Bill's experiment, and the Clefairy is actually him. Talk to him, and he'll go inside his machine. Press "A" against his computer, and he'll be transported to the other end of the machine. Finally, he'll come out as Bill, a human scientist. Talk to him again, and he'll give you a S.S. Ticket for the S.S. Anne in Vermillion City. Now that that's taken care of, it's time to go back to Cerulean City and challenge the gym leader!
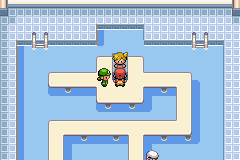 Cerulean City is the city of water. Naturally, Water Pokemon are what the trainers in the Gym use. There are two trainers you must battle before battling the gym leader, Misty.
 Now that you're on the other side, go south, and you'll find a house. That's the Day Care Center. The old man inside will raise your Pokemon's level ($100 for each level) if you leave it with him. The only bad thing is that your Pokemon might learn some unwanted moves, and delete moves that you want. The good thing is, if you were to leave a weak Magikarp with him, and walk for a while, it'll be able to evolve in no time into a powerful Gyarados! I highly suggest that you catch a Meowth on Route 5. Meowth is a special Pokemon in that once in a while an item mysteriously attaches to it. Many times the item is a Berry, but the items are not just limited to Berries. The entrance to Saffron City is closed, so you'll have to detour through the Underground Path to the next route.
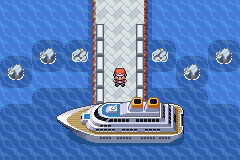 The S.S. Anne may seem small, but it's huge inside. It can be found by going south of Vermillion City, and "flashing" your S.S. Ticket to the guard. If you explore each and every room inside, you'll find tons of trainers and quite a few items. A girl in the second room from the right on the main deck can heal your injured Pokemon. In the ship's kitchen, you'll be able to find your first Berries, three of them to be exact, in the trash cans. From now on, all Berries will be stored in your new Berry Pouch. To end your stay at the S.S. Anne, fight Gary on the second floor.
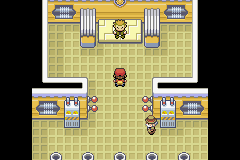 Cut the tree blocking the path to the gym and go inside, where you'll face a few trainers who use Electric Pokemon. Now comes the hard part: Lt. Surge, the gym leader, has put electric locks on the door that leads to him, so you'll have to solve a puzzle. There are a bunch of trash cans. Press "A" on every one of them until it says that you've found and flipped a switch. You need to flip two switches for the door to open, so you'll need to find the second switch. The second switch is always either is always either above, beside, or below the first one. If you get it wrong, the switch will be reset, and you'll have to do everything over again. This is a very tricky and sometimes annoying puzzle, but hopefully, you'll get it sooner or later. And when you do open the doors, it's time to fight Lt. Surge.
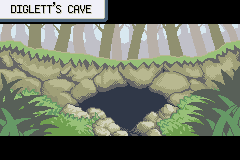 If you go east from Vermilion City, you'll find Diglett's Cave on Route 11. This cave is no maze. It's simple to go through since there's only one road. There are no items to pick up. The only Pokemon you'll find are Diglett and the occasional Dugtrio. Head inside and go to the other end to go back to Route 2 for some important business.

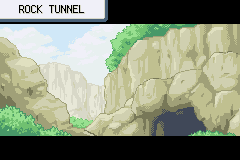 Rock Tunnel requires that your Pokemon know Flash, otherwise, you'll only be able to see a tiny bit. Like Mt. Moon, Rock Tunnel is a maze. There are items, trainers, and new Pokemon here. Here, you'll meet a Pokemon every eight to ten steps, which is more than normal. Use Repel if you don't want to meet too many wild Pokemon. After you exit the tunnel, you'll fight a few trainers, and will then be heading to Lavender Town.
 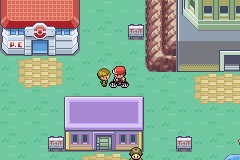 Lavender Town has no gym, so you won't be able to do much here. Later though, you can catch Ghost Pokemon in the Pokemon Tower when you get a Silph Scope. Without it, your mission in the tower won't be complete, and all the Ghost Pokemon won't be identified. For now, you can battle Gary in the tower on the second floor. Gary's team now greatly varies depending on who you chose for your starter at the beginning of the game. Once you get the Silph Scope, you'll find Mr. Fuji at the top of the foggy tower, and he'll give you a PokeFlute that's used for waking up Snorlax and other Pokemon.
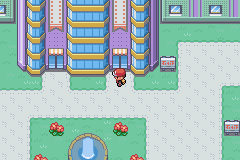 Celadon City is the largest city in this game. Its PokeMart has six stories; no wonder it needs an elevator! They sell all sorts of things. You'll be able to buy TMs and normal items (such as Potion and Antidotes) on the second floor. On the third floor, you'll see many people playing Game Boy Advances. Talk to the person at the register, a Move Tutor, and he'll teach one of your Pokemon the move Counter. The fourth floor has many evolution stones you can buy to evolve certain of Pokemon (ex. Eevee) for $2100 each. On the fifth floor, you'll be able to buy items such as X Attack and Calcium. These are items that modify a Pokemon's stats so they can do better in battle. Finally, you'll reach the rooftop, where you'll find three vending machines and two people, including a little girl. Get a Fresh Water, a Soda Pop, and a Lemonade from the vending machine, and give it to the little girl one at a time. She'll give you TM16 - Light Screen, TM20 - Safeguard, and TM33 - Reflect, respectively, for your drinks.
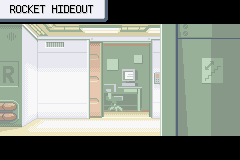 After that, you'll be going through four floors, battling Rocket members and collecting valuble items. There is a spin maze on the second basement floor (B2F). The arrows in the maze will toss you in whichever direction the arrow points. Here, you'll pick up a few items including a Moon Stone and TM12 - Taunt. On B3F, you'll find TM21 - Frustration and Blackglasses, which boosts the power of Dark Pokemon. There is another spin maze on this floor where you can pick up a Rare Candy. Head to B4F, where you'll find TM49 - Snatch. Battle the single Rocket member at the top, and he'll drop the Lift Key for the elevator. Take the elevator on B2F to B1F. Battle the Rocket member, and take the elevator again to B4F. Go all the way to the left, and pick up the Calcium. Head up to the two Rocket guards and talk to them. They'll fight you, and after you're through with them, they'll open the gates.
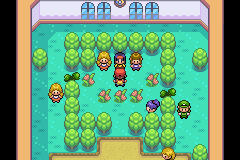 After beating Giovanni in the Game Corner, head to the gym by cutting the tree. Here you will battle Erika and other trainers (many of which you can avoid, who all use Grass-type Pokemon. Erika is the trainer in the middle between the two trainers inside the enclosed area. She has a lv. 29 Victreebel, a lv. 24 Tangela, and a lv. 29 Vileplume. If you choose a Fire Pokemon as a starter, then beating her would be very easy. Even if you didn't choose a Fire-type starter, a Psycic or Ground Pokemon would come in handy, since Victreebel and Vileplume are weak against those types. Beating her earns you TM19 - Giga Drain and the Rainbow Badge! Next, head to Lavender Town's Pokemon Tower with your Silph Scope.
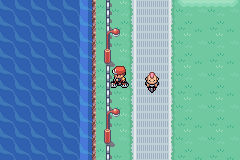 Going through to Cycling Road is the faster solution to getting to Fuschia City. To begin, go west from Celadon City onto Route 16. Go through the Guard House, and you'll be on the Cycling Road (you must have a bike!). On this road, you go downhills, which means that your bike will move by itself without any action from you. However, if you try to go up the hill, you will be going very slowly. There are many Bikers that you can fight on this road, which takes up Routes 16 and 17. After a long bit of biking, you'll reach Route 18.
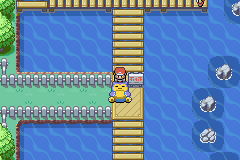 Around halfway through Route 12, you'll encounter another sleeping Snorlax who's blocking the road. You must use your PokeFlute to wake him up and catch it or defeat it. There's a house on this route with a Fisherman inside who'll give you the Super Rod, which is the best Rod in the whole game. After that, you can cut a tree, fight the trainer that's enclosed, and pick up an Iron. After going on Route 12 for a long time, you'll soon begin traveling on Route 13.
 Fucshia City is the home of the Safari Zone, an area filled with capturable wild Pokemon. Right now, you can visit the Move Deleter's house, which is located right next to the Pokemon Center, to delete an unwanted move. Visit the house next to the house with the mailbox for a Good Rod. We'll visit the Safari Zone later. For now, we need to fight the gym leader of this city's gym.
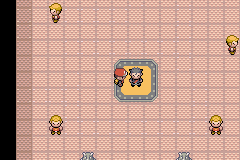 It's time for you to get your sixth badge in the Fuschia Gym. However, getting to the gym leader may not be as easy as you think. The gym is filled with invisible walls. You have to walk around and figure out which areas you can go through and which ones you can't. Start on the right side, with the trainers serving as markers. Although they are invisible, a close observer would see that white dots mark the outlines of the walls.
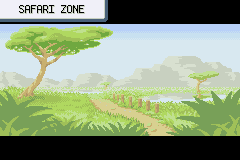 Go into the Safari Zone, which can be found in the northern part of the city. It'll cost $500 to get into the Safari Zone. They'll give you thirty Safari Balls, which is used exclusively to capture Safari Zone Pokemon. Your mission now is to find the Surfer's House, which is deep inside the Safari Zone, and get HM03 - Surf. Your other mission is to find Gold Teeth. You have 600 steps before your time runs out; good luck!
 Once you enter, go right and push the boulder into the hole using Strength. Go to the other side (past the first ladder you see), and push the other boulder into the other hole. Go back to the original hole, and fall into it. Keep on pushing the boulder and following it (falling into the holes with the boulder) until you reach the water. Once you do, the current will take you to another level. Go up onto the land, left, and down all the way for an Ultra Ball. Take the only ladder to another level. Follow the path south and you'll find a puzzle involving a few holes and plenty of boulders.
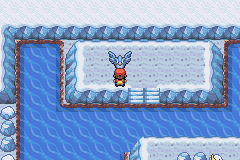 Push the only boulder that you can push left all the way left so that it doesn't block your way. Next, push the single boulder into the hole. Now you'll have to work on the last two boulders. Push the one on the right all the way up, and find a way to push the other boulder into the other hole. Now jump into that hole. You'll reach another level. Surf up, and you'll meet Articuno.
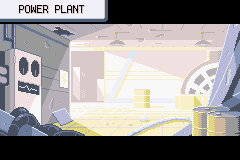 Before you go to catch Zapdos, make sure that you have plenty of Ultra Balls, Great Balls, and preferably, a Pokemon that can put another Pokemon to sleep or paralysis. Fly to Route 10, go north from the Pokemon Center, and begin surfing in the water. Surf all the way south until you reach land. You have reached the Power Plant. Deep inside here, you'll find Zapdos.
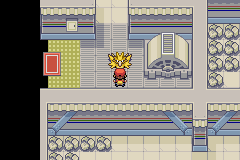 The Power Plant is filled with Electric Pokemon and many Itemballs. Some of these Itemballs are actually Electrode trying to trick you into picking them up. The most they'll do is some damage. Don't be afraid of running into an Electrode; try to pick up every Itemball to make sure that you don't miss any items, especially TM25 - Thunder and the Thunderstone. The Power Plant is pretty easy to navigate. Soon, you'll find a lv. 50 Zapdos. Here's a tip that a trainer must always follow: save the game before fighting it, and restart the game to catch it again if you make it faint.
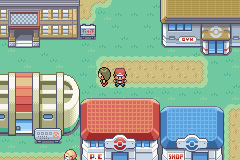 Cinnabar Island is a small island that's packed with buildings and full of things to do. On this island, you'll find the typical Pokemon Center and PokeMart, a gym, the Cinnabar Mansion, a research center, and two people standing outside. The first thing we'll do is go into the Pokemon Lab.
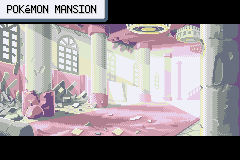 You'll notice that the Cinnabar Gym is locked. The key that'll unlock the door can be found in the Pokemon Mansion.
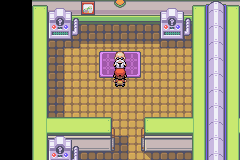 Before you fight the Gym Leader of Cinnabar Gym, you must go past six trainers. You will either answer a question right to get pass them without a battle, or you'll have to battle them. To answer a question and get to the next room, you must go to the Quiz Machine, and answer "Yes" or "No" to the question asked. Here are the answers to all six quizes: Yes, No, No, No, Yes, No.
 Right after arriving on the first Sevii Island, also known as Knot Island, Bill will take you to the Pokemon Center and lead you to a huge machine with his friend, Celio, standing next to it. Bill tells you that the machine is broken, and he needs you to find the parts to fix the machine. He gives you a Meteorite from Mt. Moon, a Tri-Pass for ferries to get the One, Two, and Three Island, and a new addition to your Town Map that contains a map of the Sevii Islands.
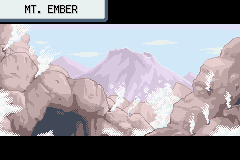 Head north from the cave with the hot spring, and you'll reach a beach. Surf north, and you'll reach Mt. Ember. Here, you'll be able to catch Moltres.
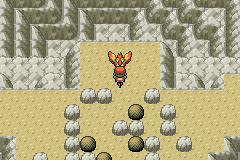 There's only one way to go in here, so it's pretty easy to navigate. Once you get out, take the stairs up. Go to the left side for a hidden Fire Stone in a boulder below the stairs. Another Fire Stone can be found by solving the easy boulder puzzle on the right side. After getting both Fire Stones, head up the stairs again. Now you'll face another puzzle, this one a little bit more difficult than the last one, but still isn't difficult at all. After getting through the puzzle, a lv. 50 Moltres awaits you.
 For now, you can go all the way north to the Move Tutor's house, located in a small region called Cape Brink. This Move Tutor teaches your starter Pokemon moves for free. She teaches one of three moves, depending on your starter Pokemon: Frenzy Plant (Grass), Blast Burn (Fire), or Hydro Cannon (Water). These moves all do 150 damage, which is a lot. Be sure to have your starter in the first slot before talking to the Move Tutor.
 You're back in Viridian City. You were here when you first began your journey; now you're here for your eigth and final badge. Go into the Viridian Gym, where you'll see a familiar maze. You've seen this spin maze in Team Rocket's Hideout in the Game Corner, and you're about to go through another one. This maze is pretty easy, and you'll wind up with the gym leader somehow.
 Once you get in, you'll see a boulder. Use Strength to push that boulder to the ground switch on the right. Now head up the stairs, and go on until you see two other stairs between a trainer: one on the left and one on the right. Take the stairs on the right for a Rare Candy and TM02 - Dragon Claw. After getting the items, take the stairs on the left, and go up the ladder.